Water is an essential part of everyone’s life whether it is human, trees or animals, water is the basic necessity of life. With the water level decreasing at a higher rate we should focus on saving it by not wasting it unnecessarily.
Saving starts from home like the taps we are using to ensure that they don’t have any leakage. Slow flowing water irritates a lot and also slows down the work in the kitchen
Read Also: How to Remove Kitchen Faucet Without Basin Wrench
What are the Flow Restrictors?
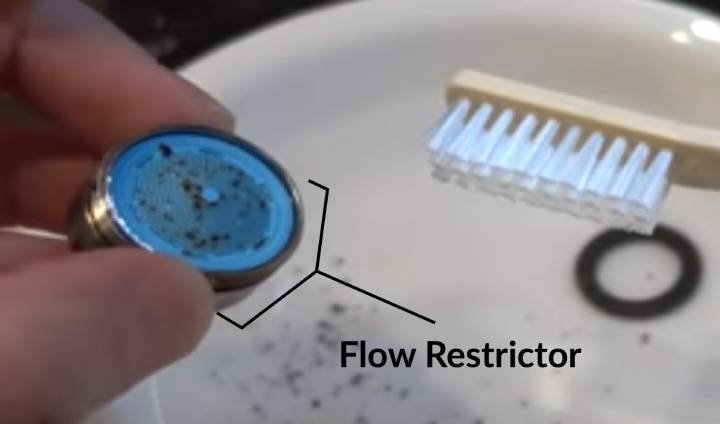
Flow restrictors are small disk-shaped barriers that control the amount of water that comes out of the faucet.
It allows a smaller amount of water to flow through its small openings because of which it gets clogged by minerals present in hard water and bits of detritus.
It needs to be cleared at least in 6 months for its better functioning.

Faucet Flow Rate
On average, the flow restrictor of the kitchen faucet flows at a rate of 2.2 gallons per minute. It increases and decreases in the flow rate depending upon the restrictor you are using.
How to Locate a Flow Restrictor in the Kitchen Faucet?
Locating the flow restrictor in the kitchen faucet is very easy to locate. Just inspect at the end of the faucet closely and see that the faucet has a screen form where the water comes out.
Yes, that is your flow restrictor. Check if it is removable with a hand or with a screw. After analyzing it you are good to go with the removal part.
How to Remove Flow Restrictor from Kitchen Faucet?
Following are the simple steps that need to be followed to remove the flow restrictor from the kitchen faucet.
Step 1
Close all the openings like the sink drain from where the small parts of the faucet may get drained away.
Restrictors are also of two types, the first is the one that can be removed by turning it in a clockwise direction and the second one is called concealed restrictors which requires removal tools to remove it.
For a clockwise restrictor, if it is too tight to move with fingers, then wrap it in a bit of cloth and lose it with pliers.
You can also use a mirror by holding it under the mouth of the faucet to check whether the restrictor is completely out or not.
Step 2
After removing the restrictor parts from the faucet, place them in order on the countertop so that they are not lost while you are busy removing the flow restrictor.
Turn on the top gently and slowly as without the restrictor water will come out with full force.
Clean the aerator screen and the flow restrictor gently with fingers or a soft microfiber cloth to clean off the dirt and mineral build-up on it.
If it is not cleaned up by this process then use either baking soda or soak it in a water and vinegar mixture for a couple of hours.
Step 3
Run the clear hot and cold water through the faucet for about 20 seconds each without the restrictor on, as this will clear the pipeline of the faucet.
If the water comes out clean then it’s ok but if dirty water or debris comes out then again run the water for the next 20 seconds.
This process will make sure that after placing the restrictors it will not clog early.
Step 4
If you open the restrictor in a clockwise direction then place it again in an anti-clockwise direction, it just needs to be hand tight.
If it was a concealed restrictor then use the aerator key to fix it again. Turn on the water to check if it is installed properly or not.
If you are using a new restrictor then place it according to the above-mentioned process of reinstalling the restrictor.
Learn more about: What Is the Effect of Oven Cleaner on Kitchen Countertops
Final Thoughts
Following these simple steps, you can easily remove and reinstall the flow restrictor of the kitchen faucet. There is no more stress if next time the water flow from your faucet is slow, you know what to do.
Cut off the work of a plumber and save money by doing this small work all by yourself. You just need to locate it, carefully remove it and your work is done. With time you will become more efficient with this work.
Save Water, Save Environment!


